
You can add text and transitions to a 360° video without losing interactive playback: place the title in the spherical scene, add a crossfade between clips, and export the result as a 360° video, not a flat reframe. The final file still needs to be opened in a player that understands spherical video.
This walkthrough uses the Mirame360 video editor and a short, stitched 360° MP4. The screenshots show a real editing session with Jan Ainali's Esino Lario 360, converted from the original WebM to H.264 MP4 for the editor. The example splits one shot into two pieces so you can repeat the process with one file; for a more noticeable transition, use two different shots.
Before you add text to a 360° video
Use a desktop or laptop and start with a short, stitched equirectangular MP4. The editor lists H.264 and HEVC where supported by the browser, up to 8K, 30 minutes and 4 GB per source. Original camera files such as INSV, OSV and .360 need preparation before the standalone editor can use them. Keep your originals; an exported edit is a separate file.
A 360° title works differently from a caption fixed to a normal flat video. The title is placed on the sphere. When a viewer turns away, it can move out of view with the scene. Choose a location where the audience is likely to look, and keep the wording short enough to read comfortably.
Add a title inside the 360° scene
Open the editor and use Import in the Media panel to choose your MP4. In the example, the 14.05-second clip appeared in the media bin and on the timeline. If your media is in the bin but not on the timeline, drag it to the video track.
Move the playhead to the point where the title should begin. Click T beside the timeline, or open the Text tab and choose Add text at playhead. Select the title and type your wording in Content. In the example, the title reads “Esino Lario,” starts at 1 second and lasts 5 seconds. Fade in and fade out are both set to 0.4 seconds.
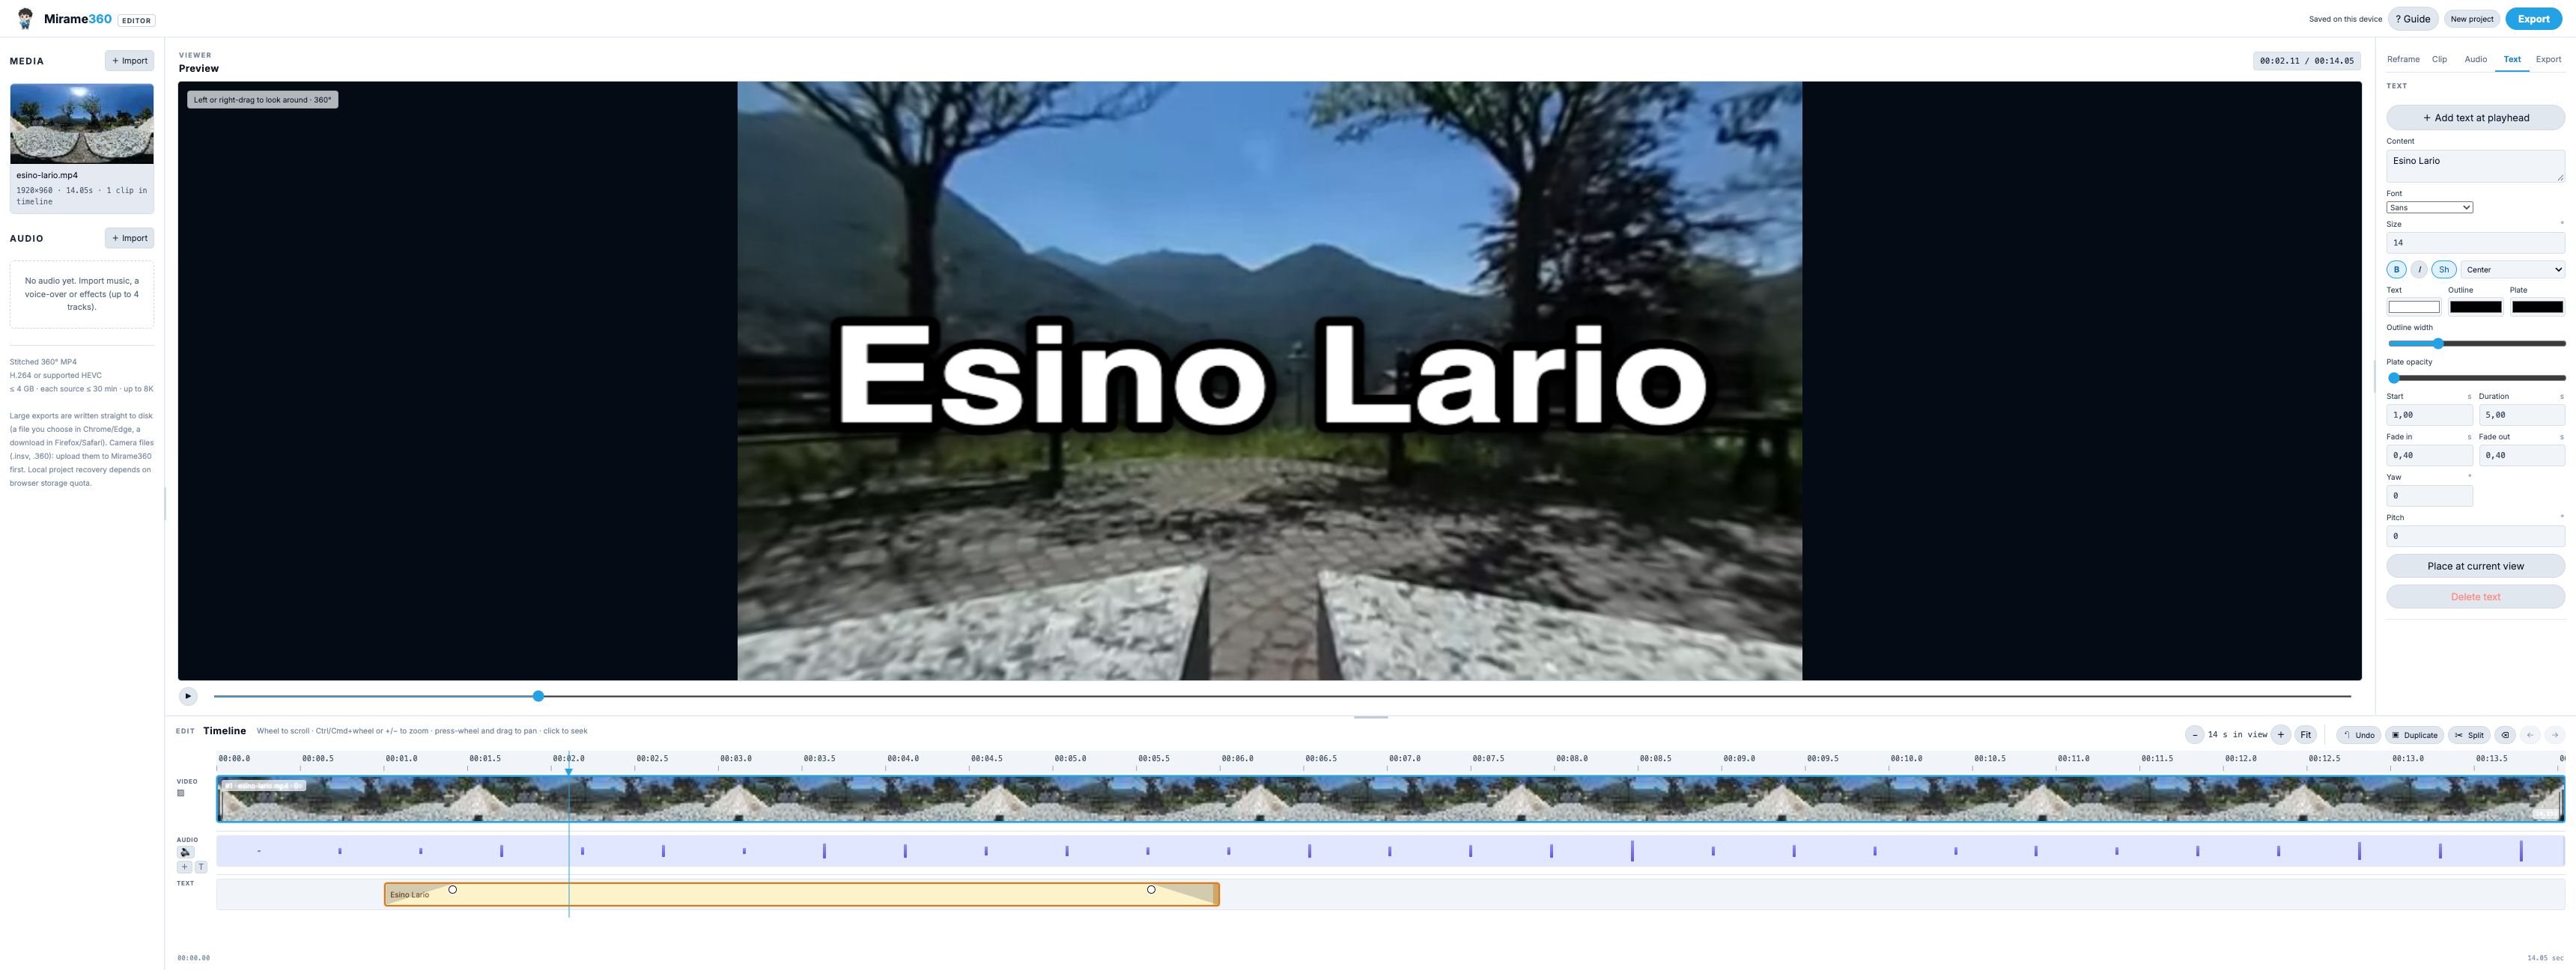
The screenshot shows the actual title and text controls in a local editor session. The starting position, duration, size, color, outline and shadow can be adjusted in the Text panel.
Put the text where people can see it
Drag in the preview to look around the panorama. With the title selected, use Place at current view to position it at the direction you're looking. The Yaw and Pitch fields give you another way to adjust its placement. Preview the result and look around: a title that appears centered in one view won't follow a viewer who turns away.
The size control is measured in degrees. Start modestly, then test it against the scene; large text can obscure the place you're trying to show. An outline or shadow can improve contrast on both bright sky and dark scenery. Move the playhead through the start and end of the title to check its fades.
Add a crossfade between 360° clips
A crossfade blends the outgoing and incoming scenes over a short overlap. It also blends the original audio, so listen for abrupt changes or unexpected sound during the join.
For this demonstration, move the playhead to about 7 seconds, select the clip and click Split. The timeline now has two adjacent segments. Click the small crossfade control at their join. In the tested example, the editor created a 1.00-second crossfade and the project duration changed from 14.05 to 13.05 seconds because the segments overlap.
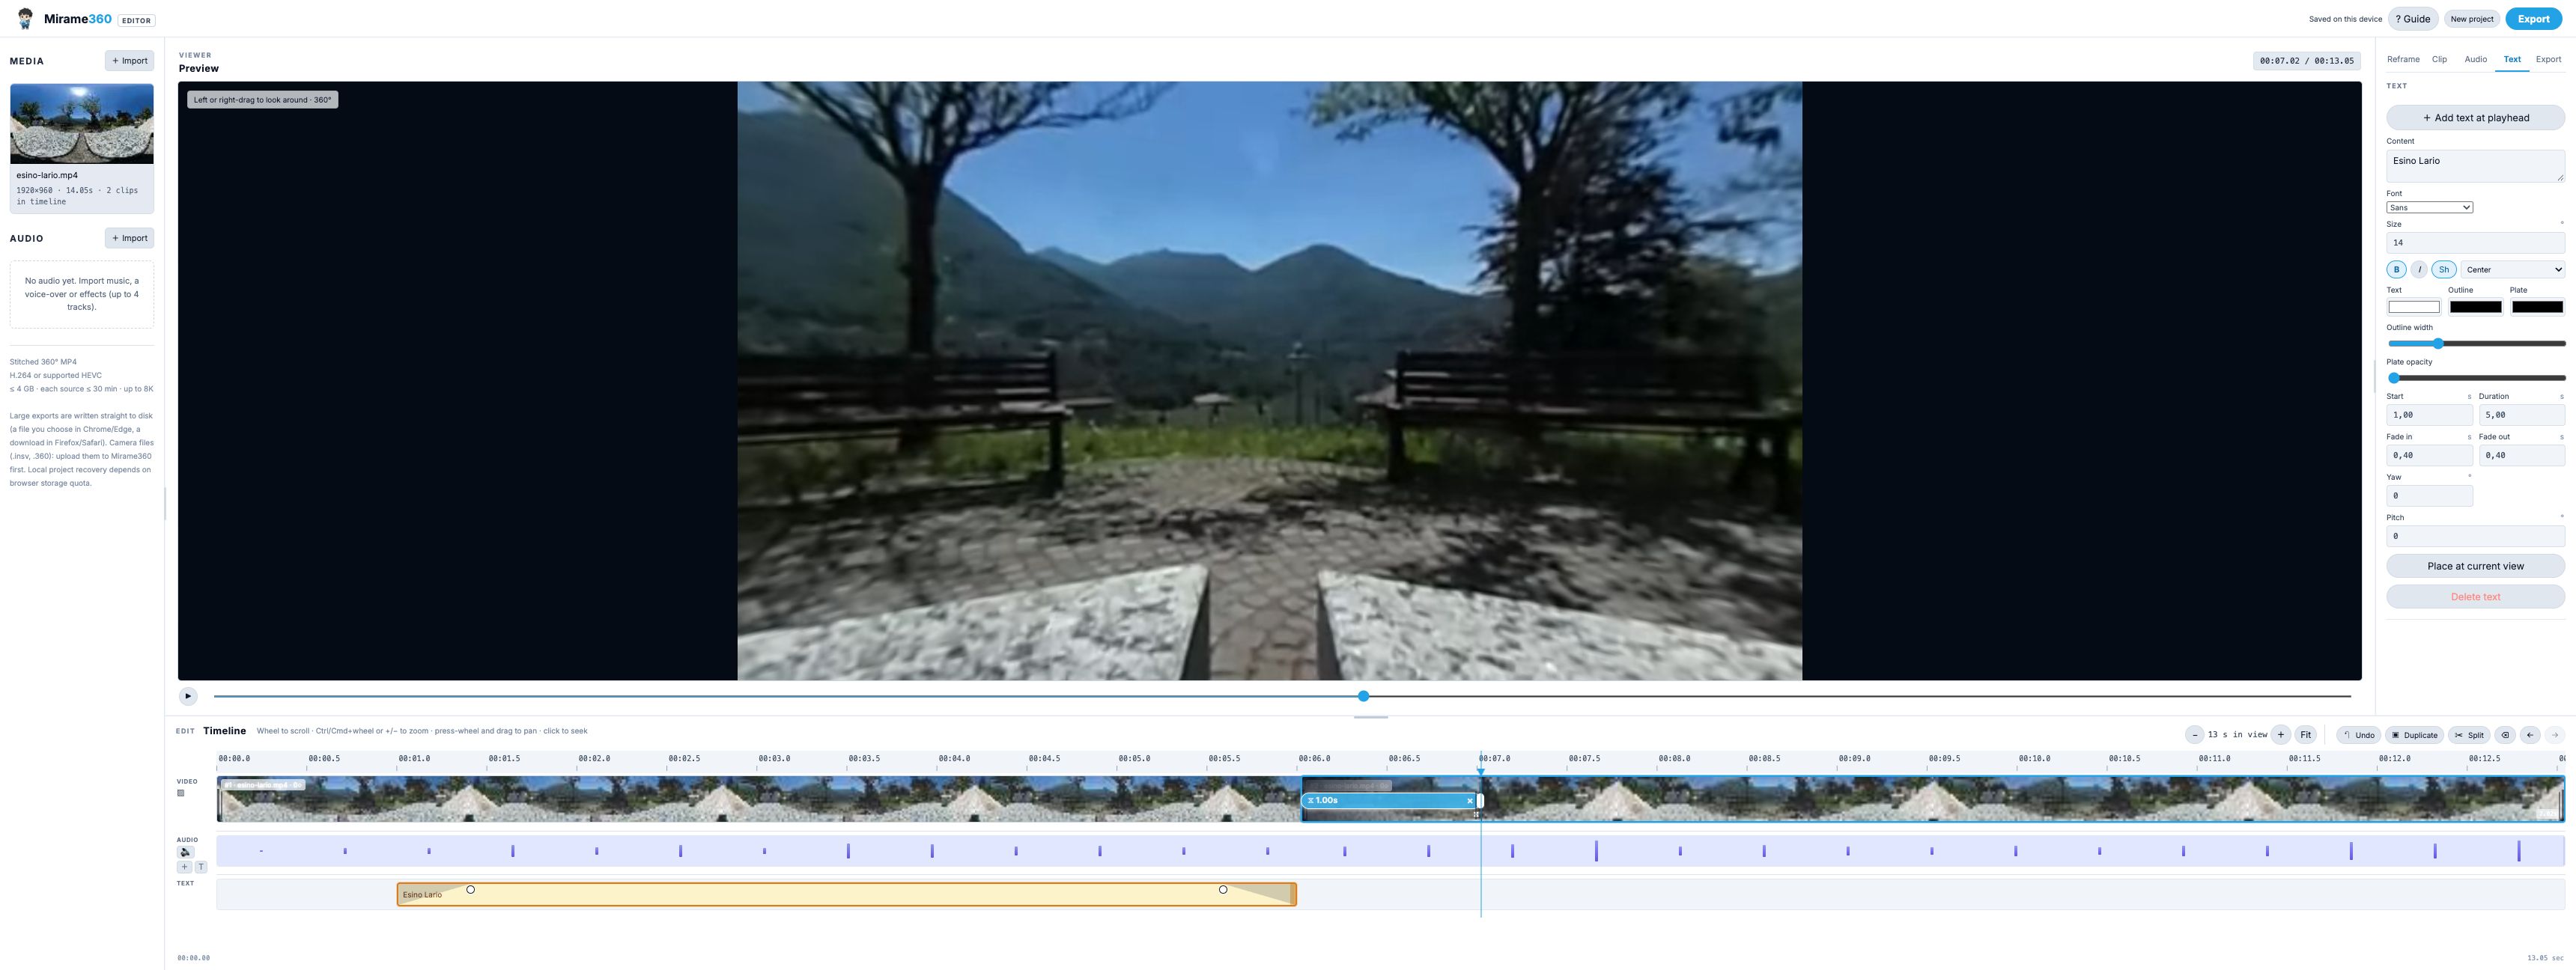
Here both segments come from the same original shot. That makes the controls easy to reproduce, but two distinct clips will make the visual blend clearer. Play across the junction and look in several directions. In a spherical video, an object entering from behind the viewer can make a transition feel different from the forward-facing preview.
Avoid placing a long title directly over a busy scene change until you've checked it. A simple location title at the beginning of a scene is often easier to read than text competing with two overlapping panoramas. If the transition doesn't help the edit, use its × control to remove it.
Export without losing 360° playback
Open Export and inspect the output selector. In the tested editor it initially showed Flat · 16:9. For an interactive sphere, choose one of the 360° options instead: 360° · 2K, 360° · 1080p or 360° · 4K. A flat 16:9 or 9:16 export is useful for a conventional video, but it contains a selected view rather than a sphere viewers can explore.
Click Export MP4 and keep the editor open while it works. In this test, the completed 360° · 2K export reported 2048 × 1024, 13.05 seconds and spherical=true. The editor displayed a download link when it finished.
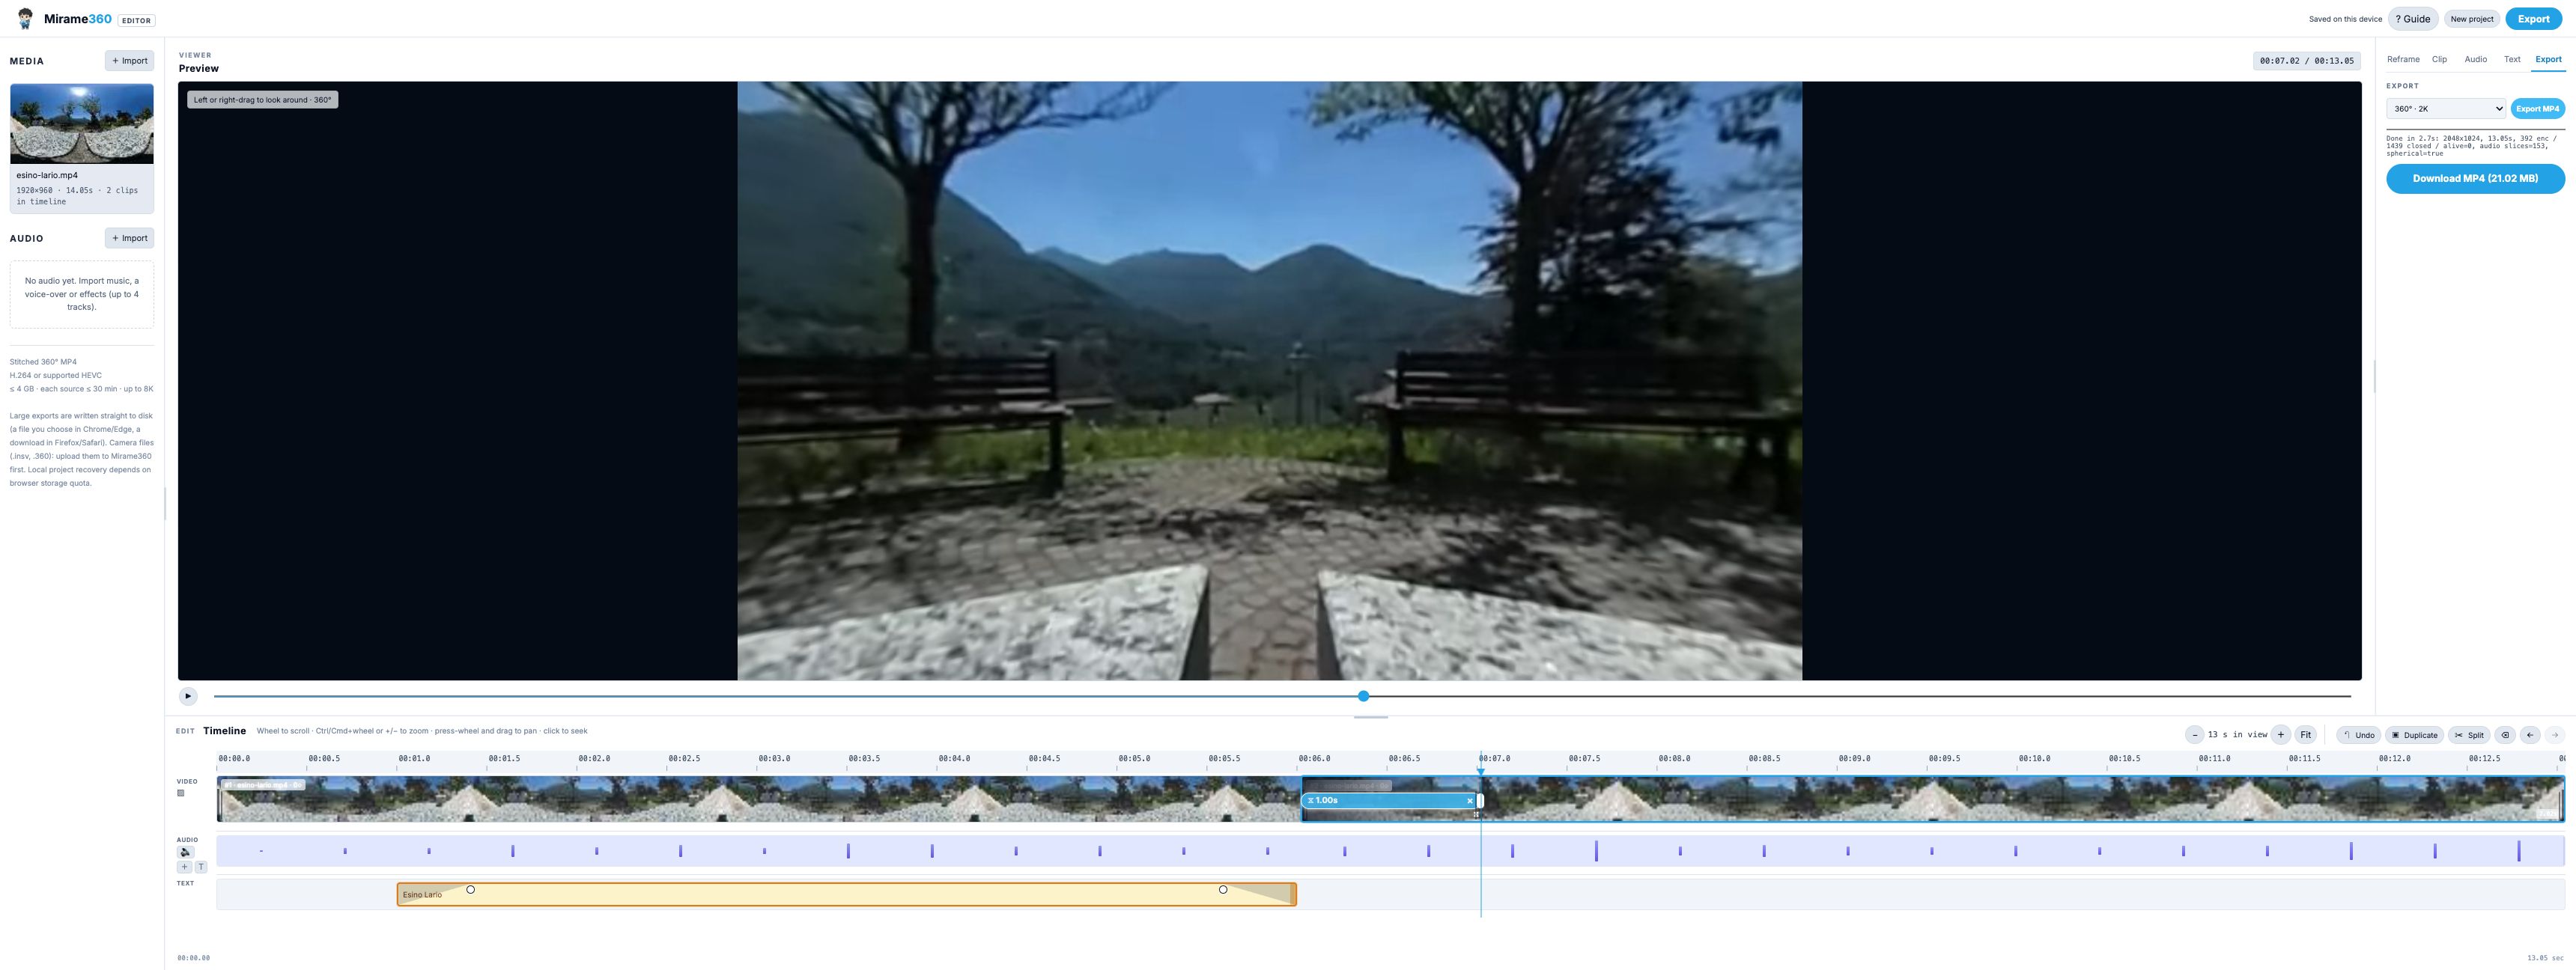
The completion message is useful, but don't stop there. Download the result, open it in a compatible 360° player and drag the view around while it plays. Check the title, the crossfade and the audio through the whole edit. A regular desktop player can show an equirectangular rectangle even when the file is intended for spherical playback; that alone doesn't prove the export failed.
Troubleshooting a flat or awkward result
First, confirm that you selected a 360° export rather than Flat. Then try a viewer or hosting service that supports interactive spherical MP4s. If the viewer still doesn't recognize the video, check the destination's current requirements and test the file in another compatible player before re-editing.
If the title seems to disappear, look around the sphere and check the title's start and duration. It may be behind the current view or outside the active time range. Use Place at current view, preview again, and allow enough time to read it.
If the crossfade sounds distracting, listen to both source clips individually. The transition blends the existing audio too; changing a visual cut won't necessarily fix an abrupt change in recording conditions.
For a fuller introduction to input files and browser requirements, see How to Edit 360° Videos Online. When you're satisfied with the result, you can create a Mirame360 account and upload the finished 360° export to test and share it with a browser link.
Video: Jan Ainali, Esino Lario 360, CC BY-SA 4.0. The original WebM was converted to H.264 MP4, split, overlaid with text and crossfaded for this demonstration. Screenshots containing the adapted footage are shared under the same license.