
To hide a tripod in a 360° photo, cover the bottom of the sphere with a soft nadir blur or place an image over the support. The free Mirame360 Photo Editor offers both options in your browser, along with brushes and colour controls for finishing the rest of the panorama.
Neither option reconstructs the floor behind the tripod. Blur hides detail; an image covers it. If you need tiles or floorboards to continue seamlessly through the area, you will need a separate patching or retouching workflow and, ideally, a clean photo of the ground.
First, choose how to hide the tripod
The nadir is the point directly beneath the camera in a spherical panorama. A tripod, monopod, camera support or stitching mark often appears there, even when the rest of the picture looks clean.
- Nadir blur is the quickest choice when a soft patch on the ground is acceptable. It covers a circular area around the bottom of the sphere.
- An image or logo gives you a deliberate cover. A transparent PNG can be placed over the tripod and adjusted in the preview.
- A reconstructed floor is a different job. It may require a clean ground shot, a patch and an external image editor. Pano2VR's patching guide describes an extract, retouch and reinsert workflow.
Think about the final viewer. A branded disc can work well in a business tour, while a blur may be less distracting for a landscape. Neither hides a long shadow outside the covered area.
Prepare the 360° photo
Start with a stitched equirectangular panorama: a full spherical image stored in a 2:1 rectangle. A 6000 × 3000 photo is one example. A regular wide photograph or a pair of unstitched fisheye images is not a complete spherical panorama just because it has been cropped to that shape.
Open the editor on a desktop or laptop. Choose a JPEG, PNG or WebP image, or drag it into the page. Editing happens on your device; you do not need an account or have to upload the photo to use the editor. Keep your original file so you can return to it if you want a different result.
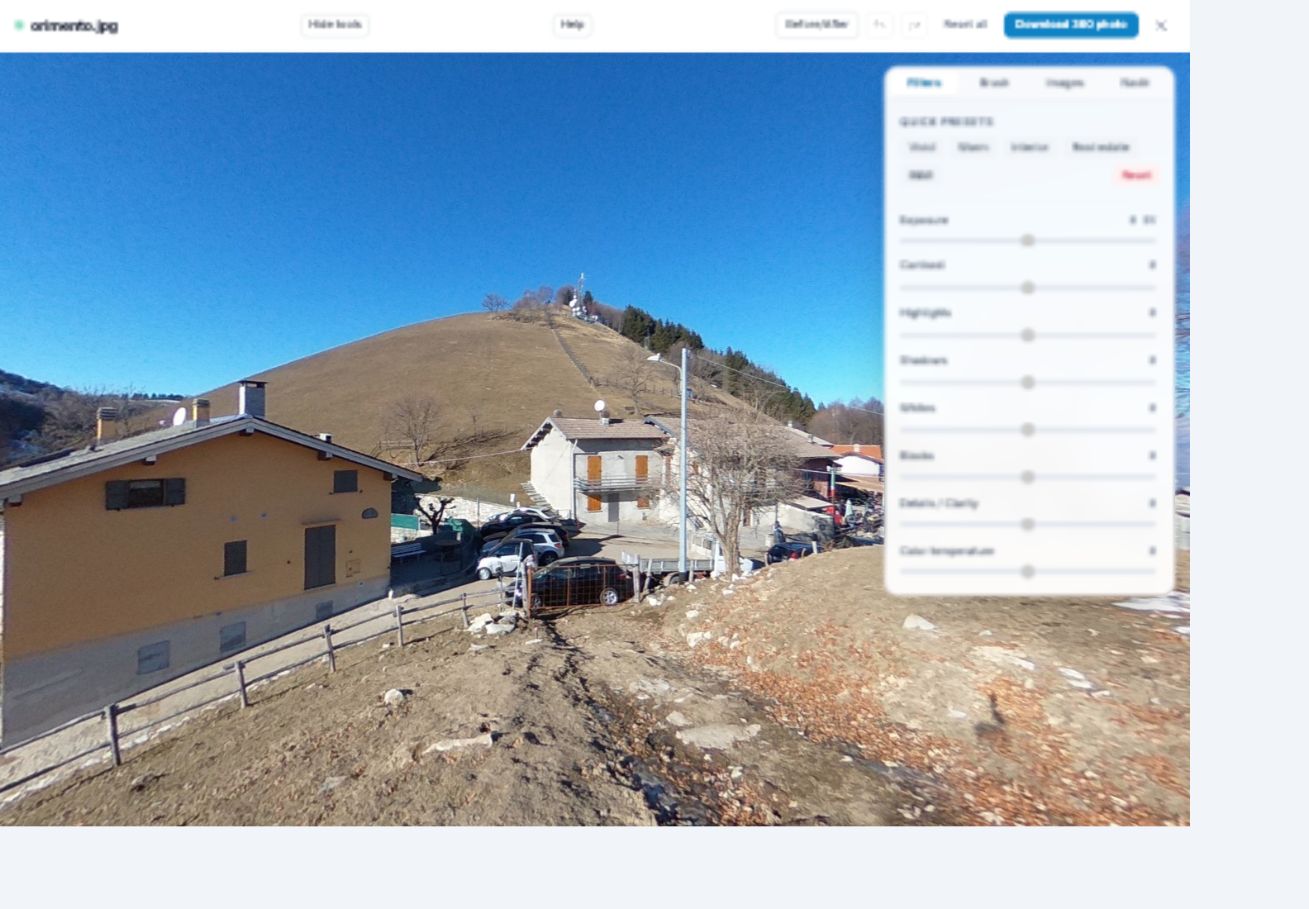
This real editor screenshot uses Kaitu's Orimento panorama, CC BY-SA 4.0. The original has a small stitching point, not a large tripod; the screenshots demonstrate the controls and their actual effect.
Hide a tripod with nadir blur
Drag the panorama until you are looking straight down. Look for the whole support: the centre may be small, while tripod feet and shadows extend further than expected. Moving the preview changes your viewing direction; it does not crop the image.
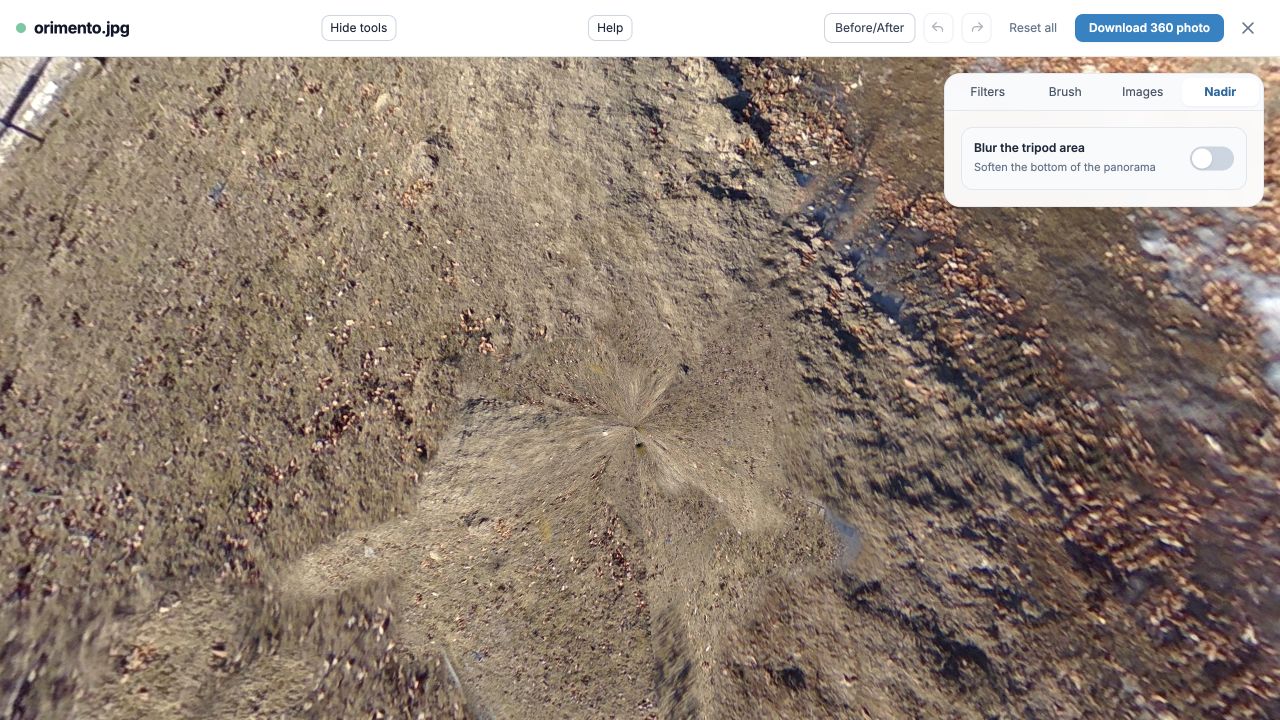
Open Nadir, then enable the nadir blur. Adjust the controls while looking at the ground:
- Increase Nadir radius until the support is covered. The control goes up to 60°. Start small and expand only as much as the photo needs.
- Adjust Opacity to control the strength of the effect. Check whether recognisable details remain visible.
- Adjust Edge softness to blend the transition with the surrounding ground. A very soft edge can leave details visible at the boundary, so check the tripod feet again.
- Look slightly away from the centre as well as straight down. A patch that looks subtle from one angle can cover too much floor from another.
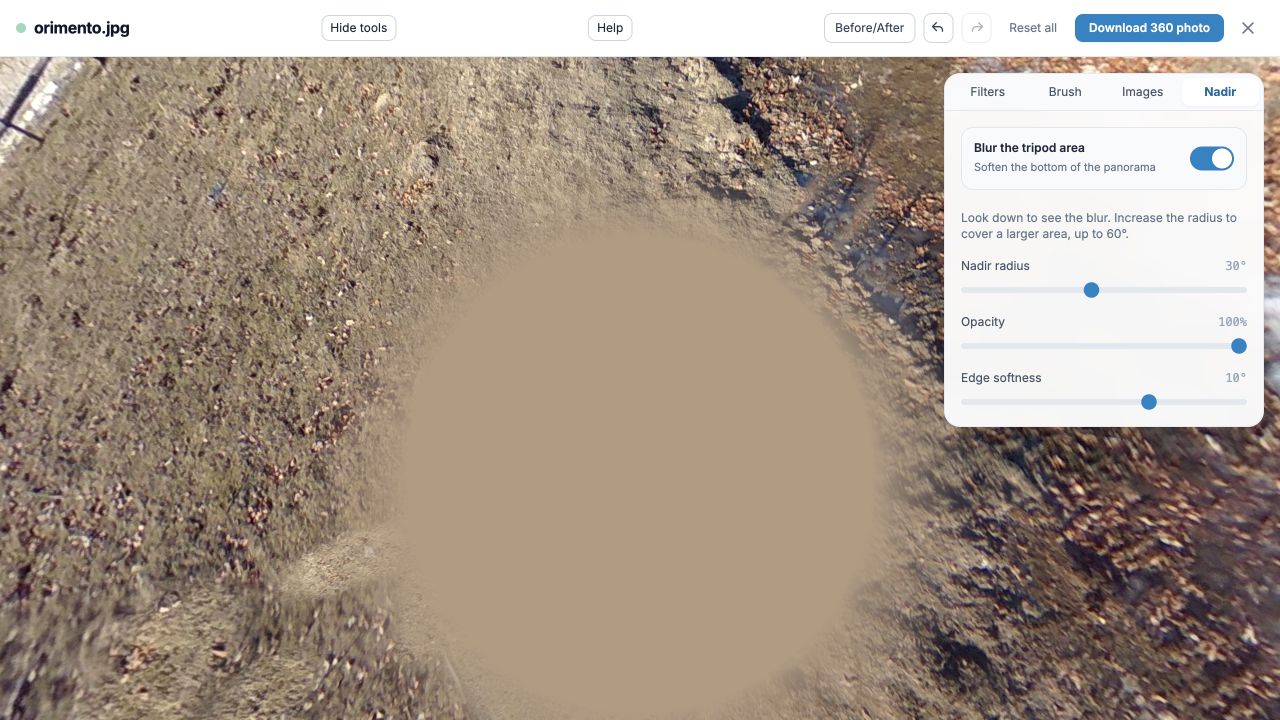
In this example the radius is 30°, opacity 100% and edge softness 10°. These settings demonstrate the controls; use the smallest suitable area for your own image.
The blur softens existing image detail. It does not generate new tiles or make the tripod physically disappear. If a support remains visible, enlarge the radius or change the strength. If the result covers too much of an important floor feature, use a patch or an external retouch instead.
Cover the tripod with an image or logo
A logo or prepared image is an alternative when you want a clean, intentional cover. In Images, select Add image and choose your file. A PNG with transparency is useful when the graphic should not have a rectangular background.
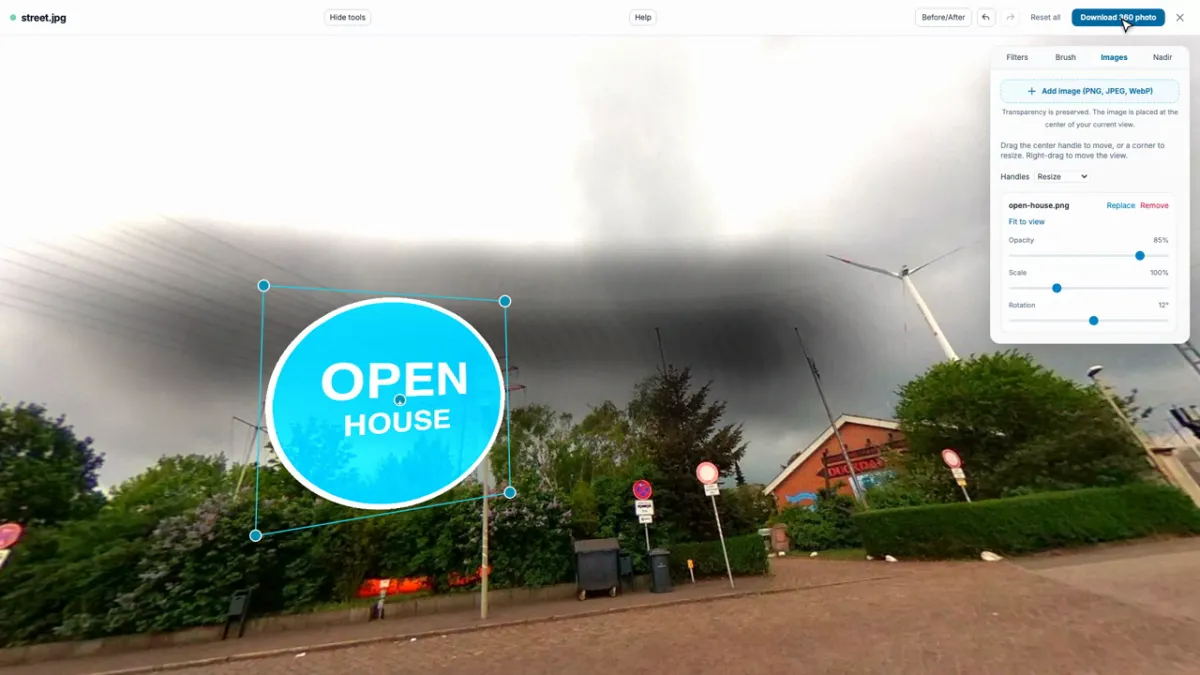
Drag the centre handle to position the image over the tripod. Drag a corner to resize it, and use the available opacity and rotation controls to fine-tune the result. Perspective mode can help the image sit more naturally on a surface. Look down and inspect the edges: make the graphic large enough to cover all feet without occupying more of the scene than necessary.
A cover is visible by design. Use a simple neutral disc if branding would be distracting, or a logo when the tour belongs to a business. A floor-texture patch also needs to be prepared separately; the image tool does not synthesize a matching floor. For another explanation of how a nadir logo is used, see PTGui's panorama FAQ.
Use the brush for local light and colour
The Brush is useful for local visual adjustments around the edited area. Choose Lighten, Darken, Saturate, Desaturate or Paint, then set the brush radius, hardness and strength. Paint with the left mouse button; use the right button to move the view while the brush is active.
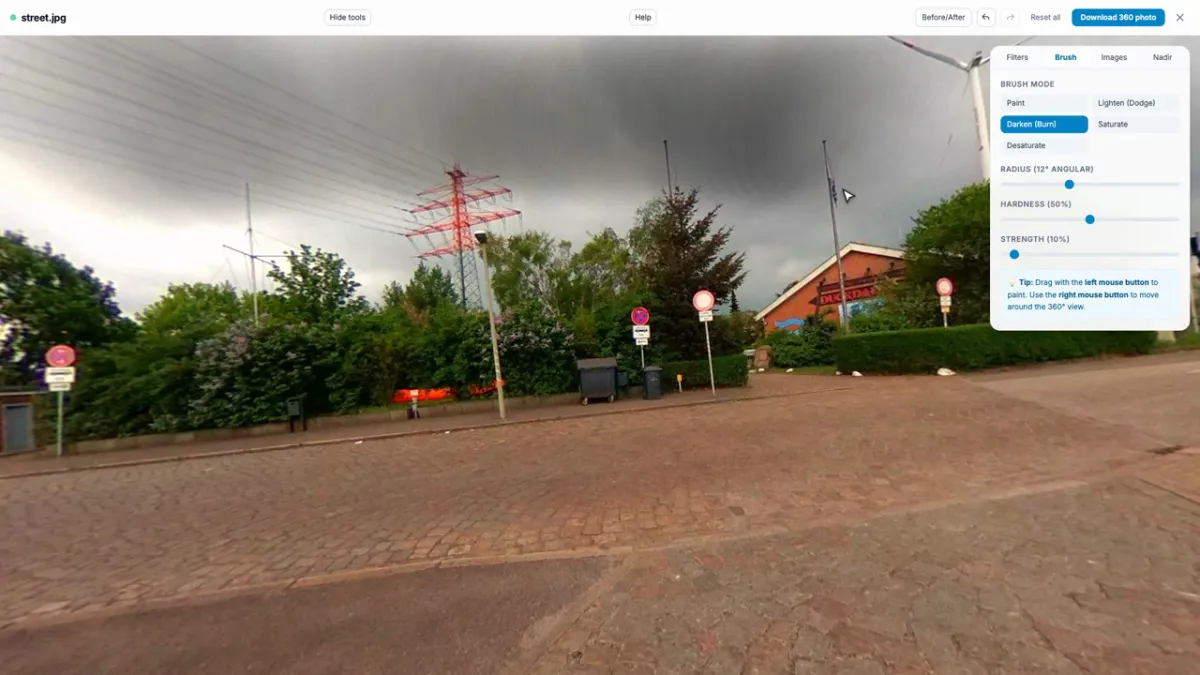
For example, a lightened patch of floor near the cover can be darkened gently to reduce a distracting difference. Work in small strokes and compare frequently. The brush changes the pixels you paint; it is not a clone, healing or blur brush, and it cannot reconstruct hidden floor or remove existing motion blur.
Adjust the whole photo and straighten the horizon
In Filters, choose a quick preset or adjust exposure, highlights, shadows, whites, blacks, temperature and saturation individually. These settings affect the panorama as a whole, so check both the ground and the rest of the room after making a change. Small adjustments are easier to judge than a dramatic preset.
The horizon leveling control rotates a crooked sphere. Straightening a horizon is separate from hiding a tripod: changing the view alone does not remove a support from the image.
Can you remove blur from a 360° photo?
If you applied the nadir blur during the current editing session, turn it off or use Undo before downloading. Before/After lets you compare the current edit with the original, and Reset all removes the session's edits. Save a copy before closing the page; the editor does not keep the session on a server.
If the only file you have is already blurred, the missing detail is baked into that file. The editor cannot recover the original floor from it. Go back to an unblurred camera export or original panorama if available; otherwise use a separate repair workflow and inspect the result carefully.
Download and check the finished panorama
Click Download 360 photo to save a new JPEG with spherical metadata. Open it in a 360 viewer and look up, down and around the horizon. Make sure the support, its shadow and the edge of any cover look acceptable from the angles your audience will see.
If another app displays the JPEG as a flat image, check it with Metadata Doctor. In the documented Orimento test, the downloaded 5376 × 2688 JPEG was recognised as an equirectangular image with spherical metadata. Individual viewers can still behave differently, so check the actual destination before sharing.
The complete photo editor guide covers the other controls in more detail. Once the panorama is ready, you can create an account to host and share it, or simply keep the local download.
Image credits
The editor screenshot using the Orimento panorama is adapted from Kaitu's original, CC BY-SA 4.0. The adaptations shown include changes to viewing direction and nadir blur and are shared under the same licence. Other screenshots are Mirame360 documentation images.