
Documentation
How to add info hotspots to a 360° photo
A 360° photo is great, but visitors do not always know what they are looking at. Hotspots are small information points inside the picture, each with a title, a description and links. This guide shows how to add them with Mirame360, without any code.
Watch: add hotspots in under two minutes
1. Open the Hotspot Editor
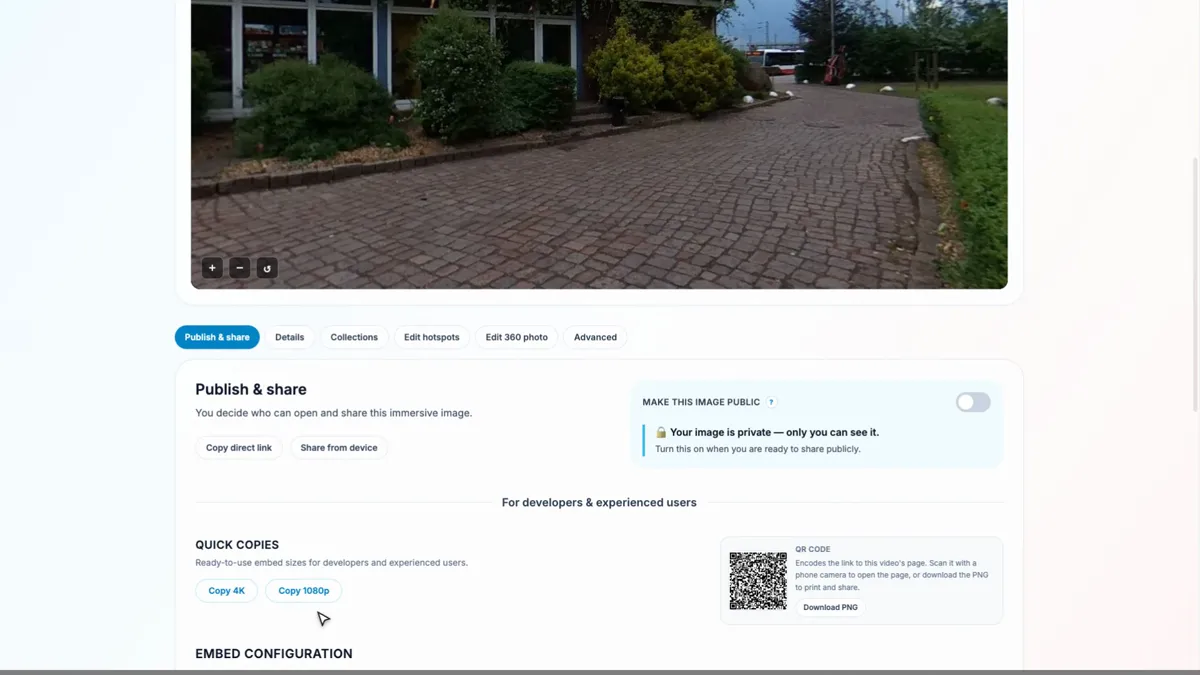
Sign in, open My media and click the 360° photo you want to describe. Below the viewer you find a row of tabs: click Edit hotspots.
Hotspots work on 360° photos, not on 360° videos.
2. Start adding hotspots
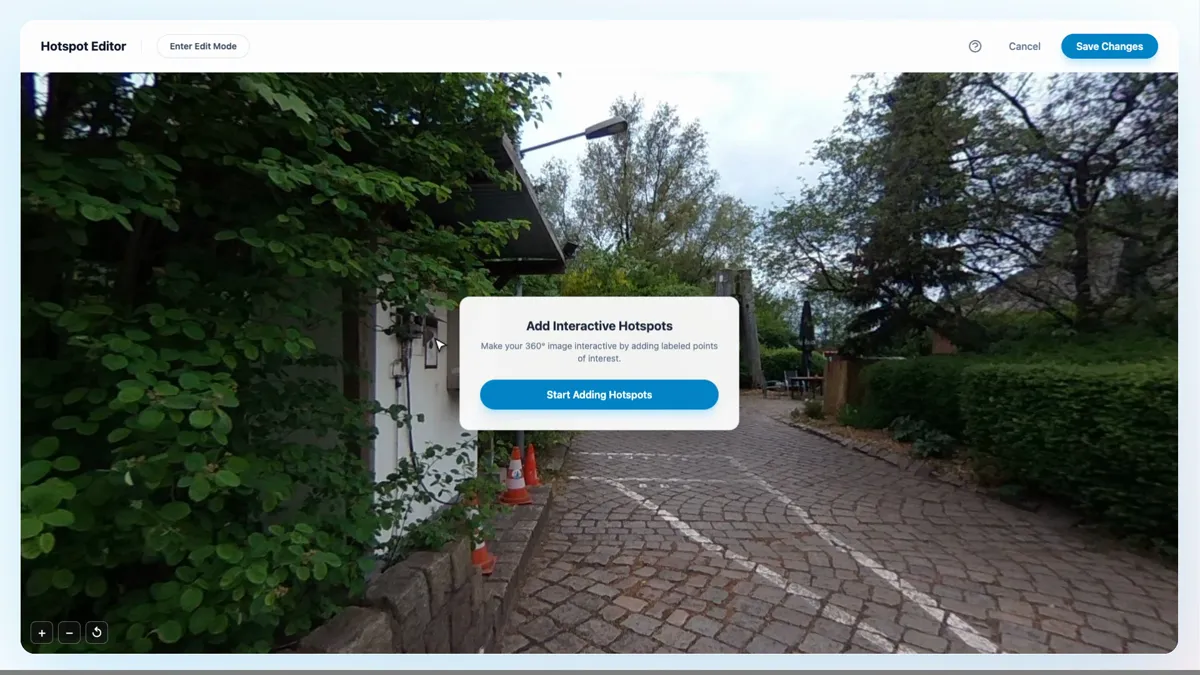
The photo fills the screen and you can drag to look around, as in the viewer. Click Start Adding Hotspots to switch on edit mode. A short Editor Guide appears on the left; you can close it with the cross and open it again with the question mark at the top.
3. Click where you want a hotspot
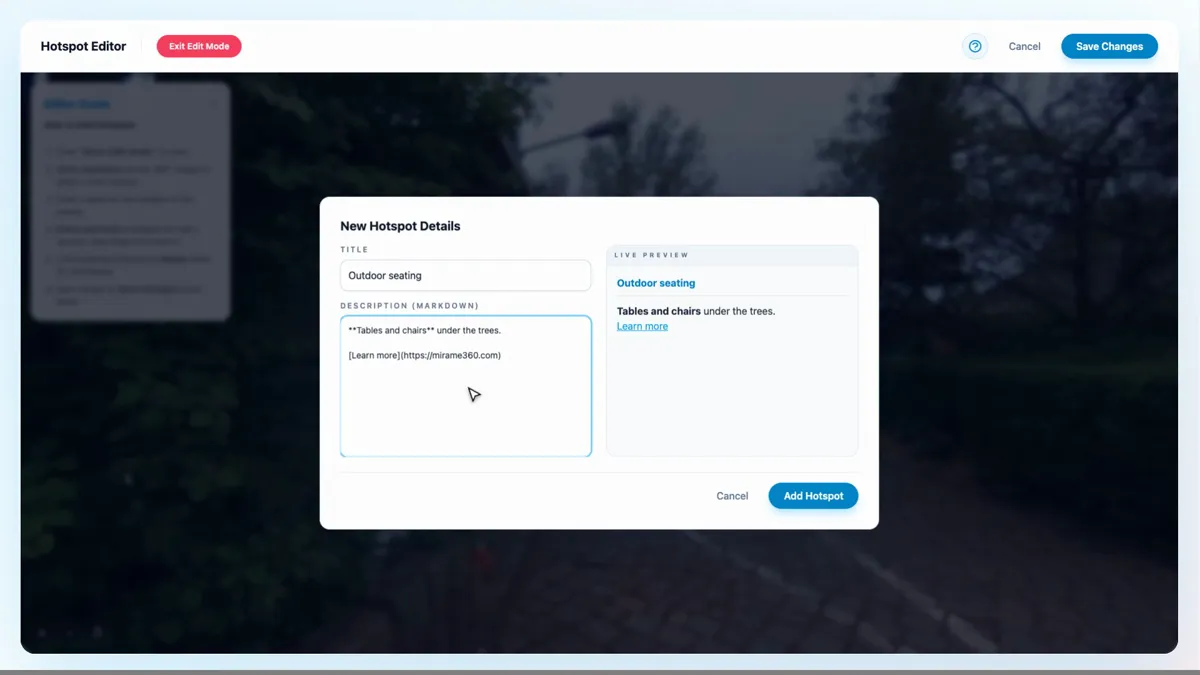
Turn the photo until the place you want to describe is in view, then click it. A window called New Hotspot Details opens. You can place as many hotspots as you like, one click each.
4. Write the title and the description
Type a short title, then a description. The description is written in Markdown, so two stars around a word make it bold and a link is written like [Learn more](https://example.com). The live preview on the right shows exactly what visitors will read.
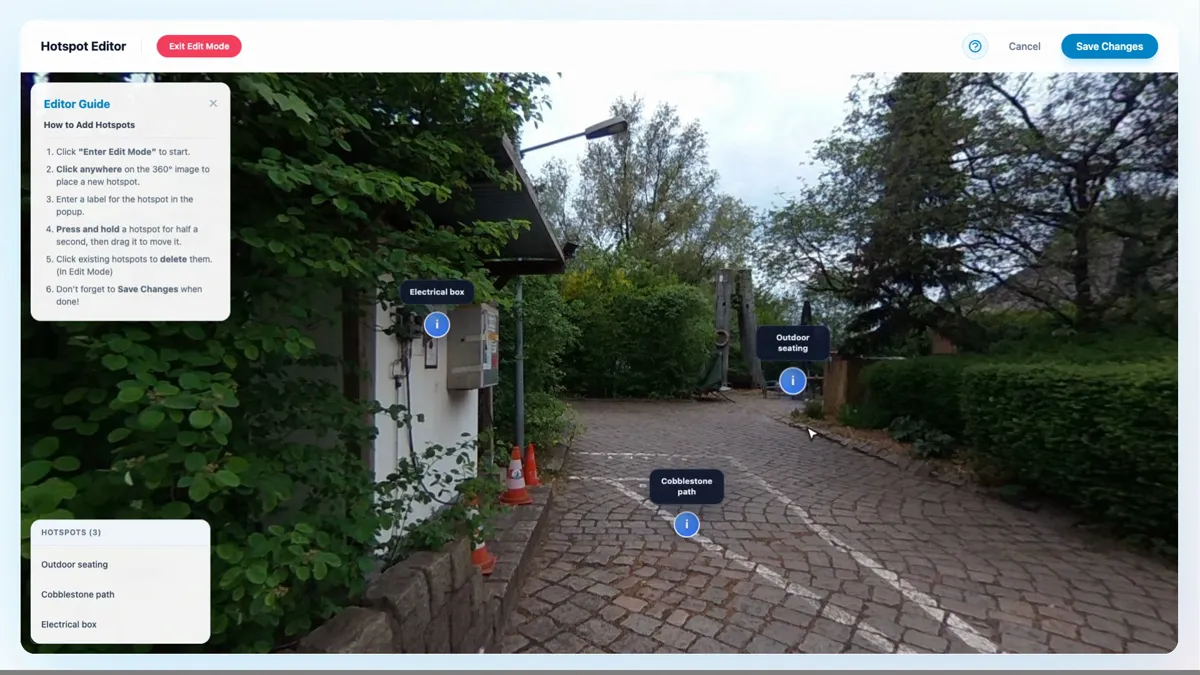
Click Add Hotspot. A small information icon with the title appears on the photo, and the hotspot is added to the list at the bottom left.
5. Edit, move or delete a hotspot
- Change the text: click the hotspot in the list at the bottom left, edit the title or the description and click Update Hotspot.
- Move it: in edit mode, press and hold the hotspot for half a second, then drag it to the new place.
- Delete it: stay in edit mode, point at the hotspot in the list and click the bin.
Press Exit Edit Mode when you only want to look around.
6. Save and see what visitors see
Click Save Changes at the top right. Nothing is stored until you do; Cancel leaves without saving.
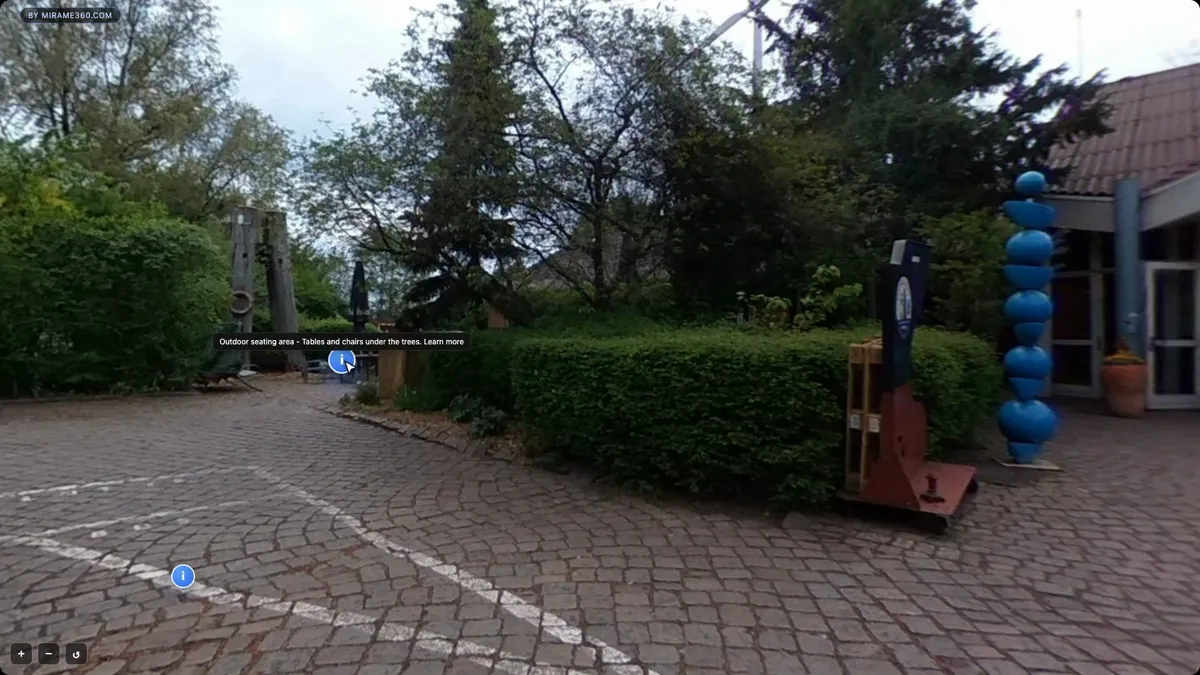
Open the photo in the normal viewer to check it. Visitors see a small information icon on each point; when they move the mouse over it, the title and the description appear, with your links. The hotspots are saved with the photo, so they show wherever you share or embed it.
Tips for good hotspots
- Keep the title to a few words, such as “Outdoor seating”, and put the details in the description.
- Use a link in the description to send visitors to a menu, a booking page or a longer article.
- Place hotspots on things people would like to know about, not on every object. A few clear points read better than many.
What to do next
Make the photo public and embed it on your website: the hotspots come with it. To connect several photos with clickable points, build a virtual tour. If the photo itself needs work first, use the photo editor.
Photo in the screenshots: "Seemannsclub Duckdalben Außenbereich" by Uwe Rohwedder, CC BY-SA 4.0, via Wikimedia Commons.